Sunday, 8 December 2013

Easy tutorial: drawstring bag

Drawstring bag: an easy tutorial
Hello and Happy Sunday!
Christmas is coming, are you feeling it? To be honest, I am not a big fan of Christmas, but these pretty drawstring purses are just perfect for this period of the year.
I have a tutorial for you and believe me, it's very easy and straightforward!
Are you ready to make a pretty drawstring bag? Here's what you need:
  • One piece of fabric 30 cm x 22 cm 
  • One ribbon
  • Sewing machine
1) Cut your fabric;

Drawstring bag: an easy tutorial

Drawstring bag: an easy tutorial

2) Fold and iron the fabric in half; fold and iron  the sides about 2.5 cm, that's where the ribbon will go through. Sew along it.

Drawstring bag: an easy tutorial

Drawstring bag: an easy tutorial

Drawstring bag: an easy tutorial

3) Now, fold the fabric, right sides together and sew along the edges, but stop just before the edge of the fold.

Drawstring bag: an easy tutorial

4) Attach a safety pin to one end of the ribbon and slide it into the channel. Knot the ribbon at the length you want (I did it as close to the end as possible) and turn the bag inside out.

Drawstring bag: an easy tutorial

Your drawstring bag is ready!!

Drawstring bag: an easy tutorial

Drawstring bag: an easy tutorial

Drawstring bag: an easy tutorial

Drawstring bag: an easy tutorial

Drawstring bag: an easy tutorial

Drawstring bag: an easy tutorial

These make a perfect gift for Christmas! You can use them to put a little present to give to someone special.
I made three drawstring purses today, all different in size and fabric and they are all so pretty. 
The tutorial above is for the medium sized drawstring bag, but you can actually use the length you want, it's so easy and quick to make!

I hope you enjoyed this tutorial and now enjoy the many pictures following :)


Drawstring bag: an easy tutorial

Drawstring bag: an easy tutorial

Drawstring bag: an easy tutorial

Drawstring bag: an easy tutorial

Drawstring bag: an easy tutorial

Drawstring bag: an easy tutorial

Drawstring bag: an easy tutorial

Drawstring bag: an easy tutorial

Drawstring bag: an easy tutorial

Drawstring bag: an easy tutorial

Drawstring bag: an easy tutorial

Drawstring bag: an easy tutorial

Drawstring bag: an easy tutorial

Enjoy what is left of the weekend and I will be posting soon, hopefully!


Saturday, 7 December 2013

Cute handmade make-up bag with African fabric

Here we go again!

Last week I managed to sew a new make-up bag with a beautiful African fabric I bought in Brixton.

I really like it and I can't wait to go back to the store and buy more fabric :)
Here some pictures of the make-up purse, I hope you'll like it!

Handmade make-up bag

Handmade make-up bag

Handmade make-up bag

Handmade make-up bag

Handmade make-up bag

Handmade make-up bag

Handmade make-up bag

Handmade make-up bag

Handmade make-up bag

Handmade make-up bag

Handmade make-up bag

Handmade make-up bag

Handmade make-up bag

Handmade make-up bag

Isn't that a lovely fabric?
Well, that's all from me now, I hope I will have time to post something new soon,

Have a great weekend!


Saturday, 9 November 2013

Easy business card holder tutorial in 10 steps

Business Card Holder Tutorial


Hi again :)

As I am thinking of setting up my own business as freelance translator, I printed some business cards to leave at translation-related events. The thing is, I need somewhere to put them, right?

Somewhere like a business card holder, an handmade one!

So, yes, this is a business cards holder tutorial. 


It is very easy to make, I will try to be as clear as possible and hopefully all the pictures I am adding will help.


Before starting, I have to give credit to the crafty cupboard, that's where I got the inspiration from!


This is how I made it:

Ingredients :)
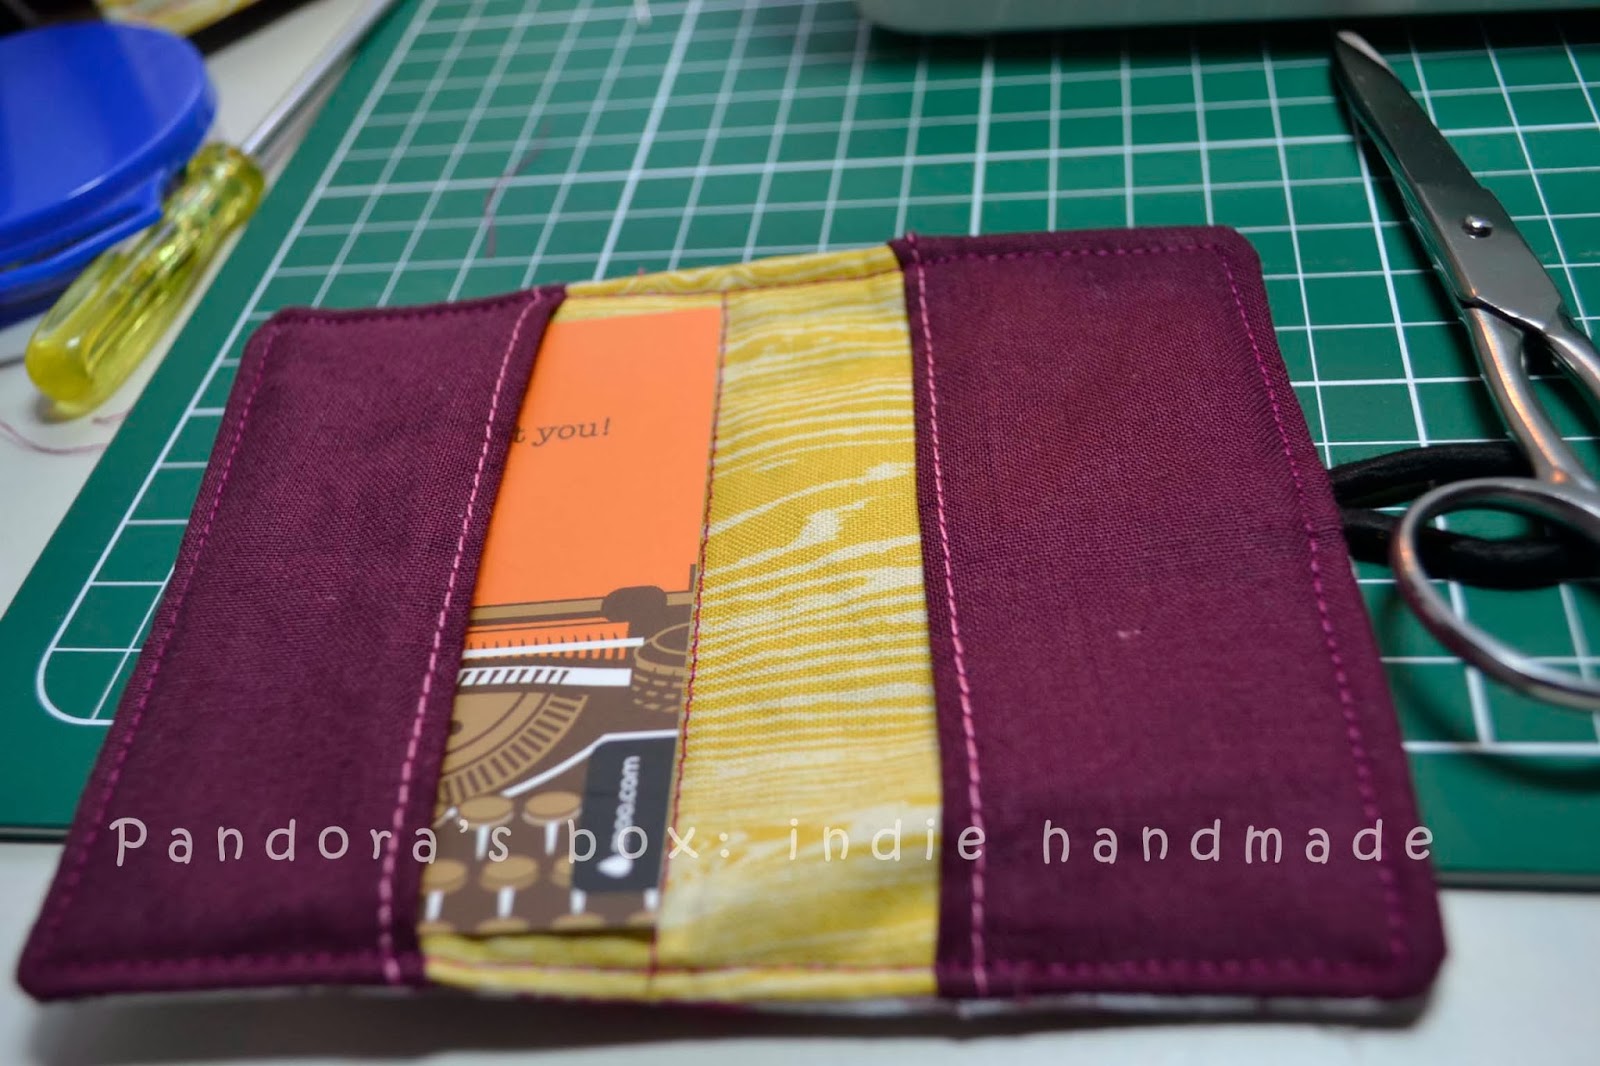
  • 2 fabric pieces about 14 cm (5 1/2") x 11.5 cm (4 1/2"). One is the lining piece and one is the outside;
  • 2 fabric pieces about 6.5 cm (2 1/2") x 11.5 cm (4 1/2");
  • 1 fusible fleece piece measuring  about 14 cm (5 1/2") x 11.5 cm (4 1/2"). I didn't use the fusible one, I used plain lining and it works perfectly fine;
  • 1 elastic hair band (I broke mine just the day before making this, so I used it)
Business Card Holder Tutorial


Step 1:
Fold and iron the long side of the two smaller fabric pieces, about 6 mm (1/4"), as in the picture:


Business Card Holder Tutorial

Step 2:
Sew along the folded side:


Business Card Holder Tutorial

Business Card Holder Tutorial

Step 3:
Now, we are going to put all the pieces on top of each other. This sounds complicated, but if you look at the pictures it is not really.

First, place the two sewn pieces on top of the lining one, as in the picture. I baste them together in each step to make thing easier:


Business Card Holder Tutorial

Business Card Holder Tutorial

Then iron your fusible fleece (in my case, I just basted it) on the back, as shown in the pictures:


Business Card Holder Tutorial

Business Card Holder Tutorial

Then place your outside fabric piece - right side down - on top of the two smaller pieces, as shown below:


Business Card Holder Tutorial

Business Card Holder Tutorial

Step 4:
Place the elastic between the lining and the top piece, again, I basted it, otherwise it wuldn't stay still. The elastic you will see at the end is the one on the inside, so you can decide how long it has to be, depending on where you want to place the button):


Business Card Holder Tutorial


Step 5:
Sew along the whole perimeter, but remember to leave space to turn your business card holder:


Business Card Holder Tutorial

Cut the corners, but be careful not to get too close to the thread:


Business Card Holder Tutorial

Step 6:
Turn your creation inside out and use something sharp to get the corners right. I used a screwdriver, but a pencil will do, too.


Business Card Holder Tutorial

Business Card Holder Tutorial

Step 7:
Iron to make it flat:


Business Card Holder Tutorial

Step 8:
Sew in the middle, dividing the card holder in two identical halves and sew along the perimeter, so that the open space you left to turn the card holder is now sewn:

Business Card Holder Tutorial

Business Card Holder Tutorial

Step 9:

Stitch a button, making sure the elastic can reach it (sorry, no pictures).

Step 10:

Enjoy your beautiful handmade business card holder!

Business Card Holder Tutorial

Business Card Holder Tutorial

Business Card Holder Tutorial

I hope you enjoyed this, I know I did!

Ciao,

Gibi


New sawing machine, new url, new life!

Yes, I am finally back!

After months of silence, here I am :)

Many things changed in these months, all in better I have to say!

1) New job, full-time,  great colleagues, very challenging but I am learning so much! I knew being a Project Manager isn't easy, but I decided to give it a go anyway and, well, so far so good.


2) New, beautiful home, 3 minutes from the train station and very cheap :) 


Living room

Master bedroom

Second bedroom

Amazing garden

Apologies for the bad quality of these pictures, they were taken with my phone...This house is just amazing, such an improvement compared to where we were before!

3) New sawing machine! It's a present from my lovely boyfriend and his mum and I love it so much! 

It's a Janome J3-24 and this is how it looks:

Sewing machine Janome J3-24

I tried it already and it works perfectly, so smooth! I can tell this is not a second hand sewing machine!

4) NEW URL! This is the new one: pandorasboxit.blogspot.com :)


I am going to post a tutorial now, I just have to edit the pictures and post them...see you soon!


Gibi


Tuesday, 23 July 2013

Recycled can: how to make a beautiful lamp

If you are Italian like me, or if you just like pasta a lot, you probably use many many tomato sauce cans, just like me :)

I kept a few, so that I could recycle them and make something nice and since my sewing machine is still hopelessly broken, I decided to make a nice lamp. 

All you have to do is deciding a pattern and drawing it on the can with a pencil. Then you have to find something with a quite sharp end, but not too sharp, and start making holes, while trying to keep the can straight. It's not as easy as one might think, but it's doable. When you have all the holes, light a candle and place it inside the can, the result is very sweet!

This is the one I did :)


Recycled can: handmade lamp

Recycled can: handmade lamp

Recycled can: handmade lamp

I think you can clearly see that this is my very first attempt, but I really like it and I think that it would look even better if I cover it with paint. I'll post some pictures later, so we can decide which version is better: "raw" or painted.

Oh! I almost forgot! When you place the candle inside the can you should leave the can where it is, because it tends to get very hot very quickly, so be careful!


Hope you enjoyed it,


Gibi